
Plumbing maintenance services in Melbourne
Outright Plumbing delivers routine plumbing maintenance with fixed prices and same-day convenience. With 25+ years’ experience and 800+ five-star reviews, we keep your home’s plumbing running smoothly all year.


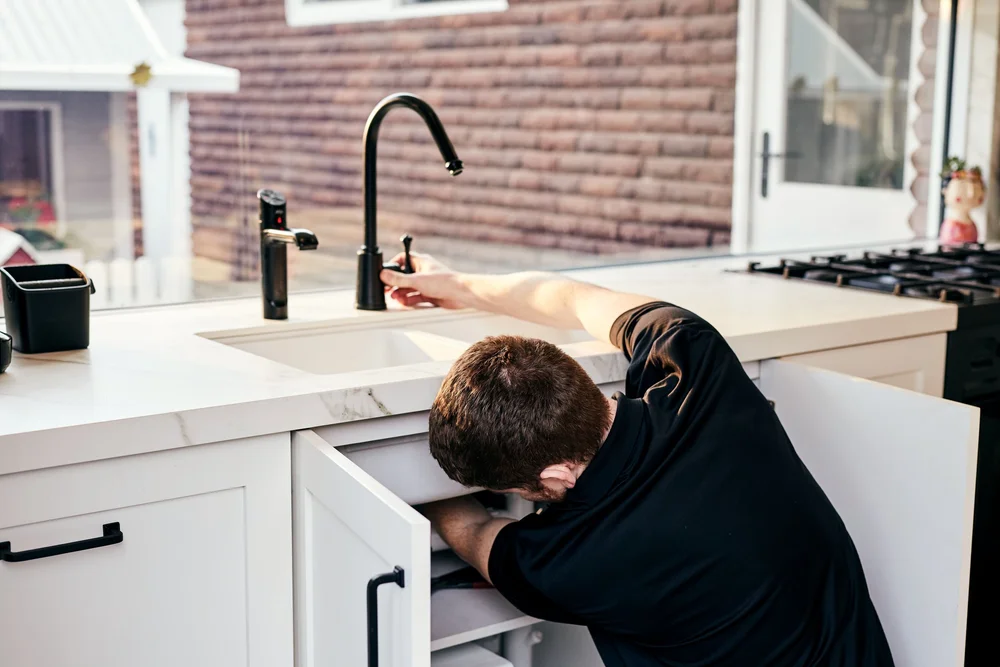
Staying on top of your plumbing before it goes wrong
Most plumbing failures don’t happen overnight. Pipes corrode, valves wear out, and blockages build slowly until something finally gives. Regular maintenance is how we catch those issues early. It means your shower runs hot, your drains stay clear, and you’re not calling us in a panic when water’s already on the floor.
- We check over your system with the same eye we use on emergency jobs.
- Small fixes are done on the spot so problems don’t snowball.
- You get straightforward advice about what’s fine, what’s wearing out, and what’s urgent.
Maintenance is part of how we look after your home
We don’t just show up when something’s broken. Outright Plumbing looks after the whole system so you can trust it day to day. From quick tap repairs to full hot water servicing, it all ties back to one goal: keeping your home running smoothly with no nasty surprises.
.svg)
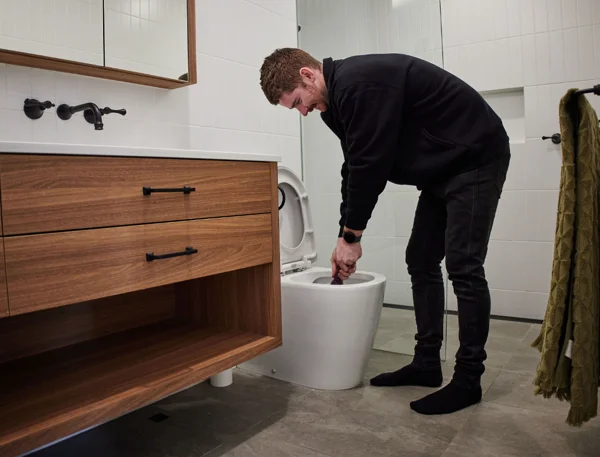
Toilet repair services
Outright Plumbing provides fast, fixed-price toilet repairs with same-day convenience. Backed by 25+ years’ experience and 800+ five-star reviews, we fix leaks and flush faults with care.

Toilet installation
Outright Plumbing installs and repairs toilets with fixed prices, neat work, and same-day service. With 25+ years’ experience and 800+ five-star reviews, we guarantee a clean, functional finish.
.svg)
Leaking toilets
Outright Plumbing resolves leaking toilets with same-day response and transparent fixed pricing. Our 25+ years’ experience and 800+ five-star reviews guarantee a clean, lasting repair.

Blocked toilet
Outright Plumbing clears blocked toilets quickly with fixed prices and same-day response. With 25+ years’ experience and 800+ five-star reviews, we’ll get your bathroom back in order fast.

Cistern plumbing services
Outright Plumbing repairs or replaces cisterns with fixed pricing and same-day service. Our 25+ years’ experience and 800+ five-star reviews make us the trusted name in bathroom plumbing.

Dripping tap
Outright Plumbing fixes dripping taps fast with same-day service and honest, fixed pricing. With 25+ years’ experience and 800+ five-star reviews, we’ll stop the drip and save your water bill.
Boundary trap replacement
Outright Plumbing handles boundary trap replacements safely and efficiently, always with fixed pricing. With 25+ years’ experience and 800+ five-star reviews, we’ll keep your drainage system compliant and working perfectly.

Garden tap
Outright Plumbing provides fast, same-day garden tap repairs and replacements at fixed prices. With 25+ years’ experience and 800+ five-star reviews, we’ll keep your outdoor taps working perfectly.

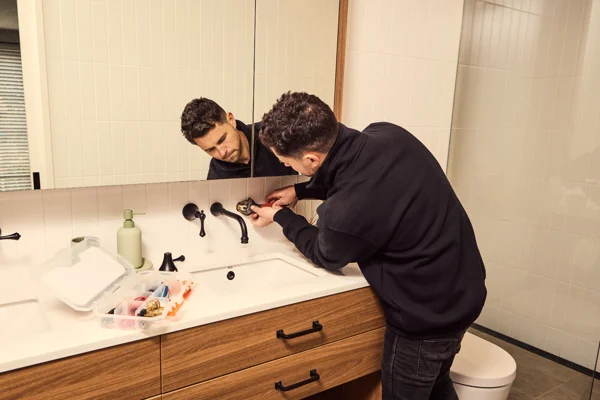
Tap installation repair
Outright Plumbing handles tap installations and repairs with care, fixed prices, and same-day service. With 25+ years’ experience and 800+ five-star reviews, we’ll leave every tap neat, watertight, and reliable.
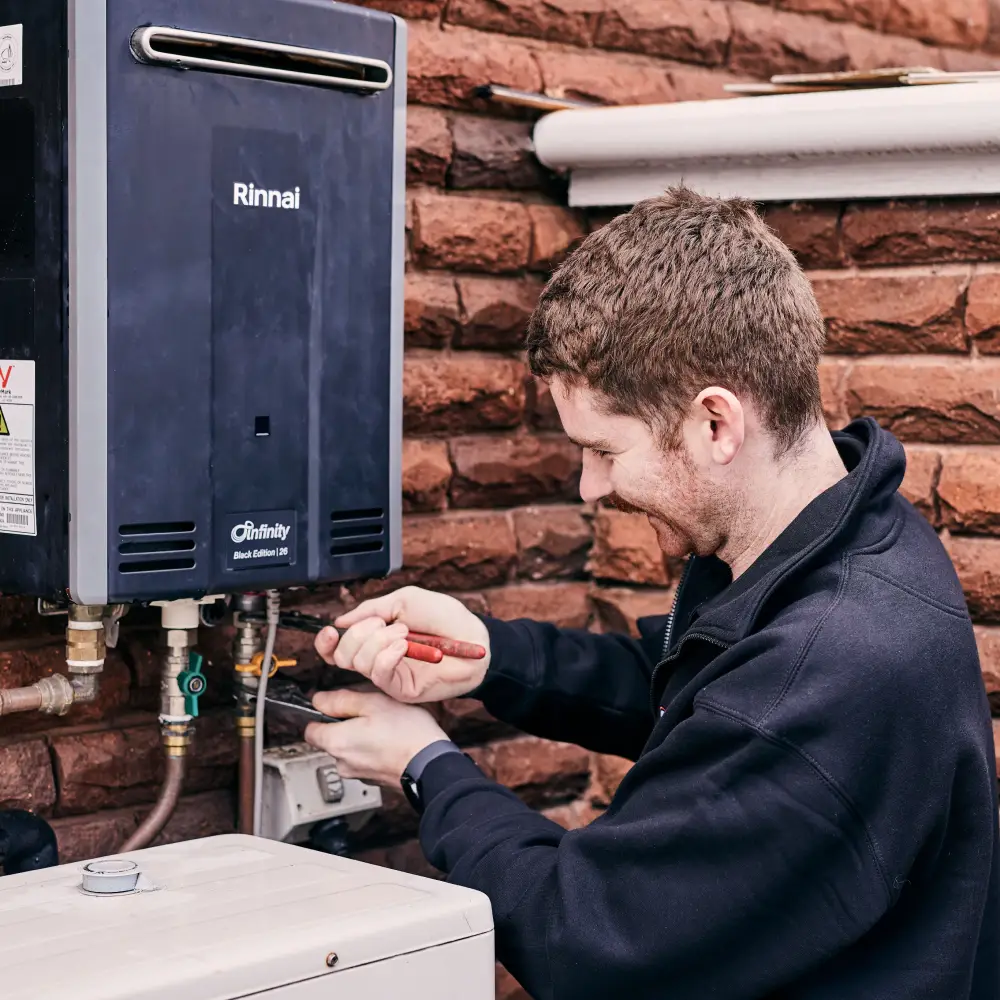
Hot water system maintenance
Outright Plumbing provides reliable hot water system maintenance with fixed prices and same-day support. With 25+ years’ experience and 800+ five-star reviews, we help extend the life of your system.

Leaking taps
Outright Plumbing repairs leaking taps neatly and quickly, using fixed prices and same-day service. Backed by 25+ years’ experience and 800+ five-star reviews, we make small jobs simple.
.svg)
Hot water services & installation
Outright provides reliable hot water system maintenance and emergency plumbing services with fixed prices and same-day services. With 25+ years’ experience and 800+ five-star reviews, we will find the best solution to extend the life of your system.

Leak detection
Outright Plumbing offers expert leak detection with same-day response and clear, fixed prices. With 25+ years of experience and 800+ five-star reviews, we’ll find and fix your leak the right way.

High pressure jetting
Outright Plumbing’s high pressure jetting clears stubborn blockages fast, with fixed prices and same-day service. With 25+ years’ experience and 800+ five-star reviews, we leave your drains spotless and free-flowing.

Roof plumbing
Outright Plumbing provides expert roof plumbing repairs with fixed prices and same-day availability. With 25+ years’ experience and 800+ five-star reviews, we protect Bayside homes from leaks and storm damage.

Low water pressure
Outright Plumbing restores low water pressure with clear, fixed pricing and same-day service. Backed by 25+ years’ experience and 800+ five-star reviews, we make your water flow strong and steady again.

Emergency plumbing services
Outright Plumbing responds fast to plumbing emergencies with fixed prices and dependable same-day service. With 25+ years’ experience and 800+ five-star reviews, you can count on us any time you need help.

Gas leak detection & repair
Outright Plumbing provides safe, same-day gas leak detection and repair with transparent, fixed pricing. With 25+ years of local experience and 800+ five-star reviews, we make safety simple and stress-free.
.svg)
Burst water pipes
At Outright Plumbing, we provide fast solutions for leaking or burst pipes that Melbourne homeowners experience. Our professional plumbers deliver a same-day service to get your plumbing system back up and running. With 25+ years’ experience and 800+ five-star reviews, we restore water flow without the stress.

Blocked drain services
Outright Plumbing clears blocked drains fast with fixed prices and guaranteed same-day service. With 25+ years of proven experience and 800+ five-star reviews, we keep your pipes flowing freely.

Drain camera inspections
Outright Plumbing uses advanced drain camera inspections to locate problems without digging. Our same-day service, fixed prices, and 25+ years of experience have earned 800+ five-star reviews from local homeowners.
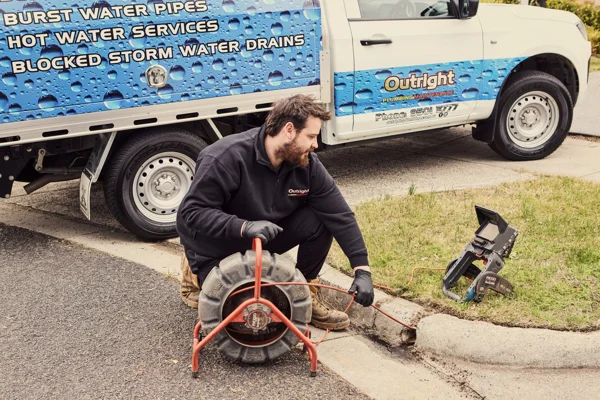
Stormwater services
Outright Plumbing restores proper stormwater flow with same-day service and clear fixed pricing. With 25+ years’ experience and 800+ five-star reviews, we protect your home from flooding and water damage.

Pipe relining services
Outright Plumbing offers no-dig pipe relining with fixed prices and same-day assessment. Our 25+ years of expertise and 800+ five-star reviews make us Bayside’s trusted drain repair team.

Sewer line cleaning services
Outright Plumbing provides sewer line cleaning with fixed prices, same-day service, and lasting results. With 25+ years’ experience and 800+ five-star reviews, we keep your system healthy and clear.

Blocked sewer drains
At Outright Plumbing, we clear blocked sewer drains quickly and cleanly with upfront fixed prices. Our team brings 25+ years’ know-how and 800+ glowing reviews to every same-day job.

Dishwasher installation services
Outright Plumbing installs dishwashers neatly and safely with fixed prices and same-day service. Backed by 25+ years’ experience and 800+ five-star reviews, we make upgrades simple and seamless.

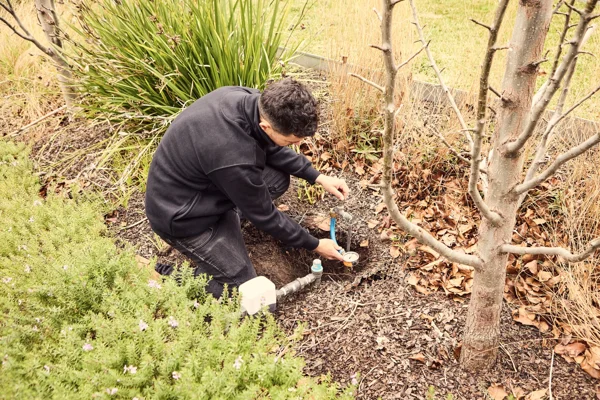
Rainwater tank installation
Outright Plumbing installs rainwater tanks with same-day service and transparent fixed pricing. With 25+ years’ experience and 800+ five-star reviews, we make saving water simple and seamless.

Tempering valve installation and repair
Outright Plumbing installs and repairs tempering valves with precision, fixed pricing, and same-day service. With 25+ years of expertise and 800+ five-star reviews, we keep your hot water safe and compliant.
Locals back us with over 800 five-star reviews
We could talk about our work all day, but it’s the feedback from our customers that really counts. With 800+ glowing reviews, it’s clear people trust us to keep their plumbing in order.
What we check during plumbing maintenance visits
Every home is different, but there are a few common weak spots that cause most of the emergencies we see. Here’s what we keep an eye on during maintenance.
Hot water units that quietly rust from the inside
We test safety valves, check thermostats, and replace sacrificial anodes before tanks corrode. A serviced unit runs cheaper, safer, and can last years longer.
Leaky taps and toilets that waste water around the clock
We spot the drips you might not notice and reseat fittings properly. A few minutes spent here can save thousands of litres (and dollars) over a year.
Drains that give early warning signs of trouble
Slow water, gurgling sounds, or damp smells often mean build-up is starting. With cameras and jetters, we can see what’s happening inside and clear it before it becomes a full blockage.
Pipework under pressure
We pressure-test supply lines and adjust regulators where needed. High mains pressure wears out washers, bursts pipes, and shortens the life of appliances. Catching it early keeps your system safe.
What homeowners often miss about plumbing maintenance
We’ve spent decades responding to emergencies, and the truth is, most of them could have been prevented with simple checks. Here are the details most people don’t realise about how plumbing fails and why maintenance makes all the difference.
A slow drip can quietly waste thousands of litres
A bathroom tap dripping once every two seconds can waste more than 10,000 litres in a year. That’s water you’re paying for, even though you’re not using it. But it’s not just the waste. That drip can seep into vanity cabinets, soften timber, and create the perfect environment for mould. Fixing it early is cheaper than paying both the water company and the carpenter.
Excess pressure is the hidden reason fittings fail early
Melbourne’s mains pressure often runs over 500 kPa. Most domestic taps, toilets, and hot water systems are designed to handle about 300–400. That extra strain wears out washers in months instead of years, makes mixers drip, and eventually splits pipes. We regularly find houses with three or four leaking taps where the real culprit was pressure. Installing a regulator saves money, water, and headaches.
Hot water systems give off warnings before they break
Most people only notice their hot water unit when it stops working. But long before that, it’s usually showing signs: rusty water from a failing anode, a relief valve that dribbles constantly, or rumbling noises from sediment in the tank. We’ve seen tanks burst and flood garages that could have lasted years longer if they’d been serviced. Maintenance is how we catch those signs before you’re left boiling kettles for a shower.
Blocked drains are months in the making
That “sudden” overflow in the toilet or gurgle in the sink usually started with grease, hair, or roots building up for months. We’ve pulled roots the thickness of an arm out of sewer lines where the homeowner had no idea until the blockage hit. A quick camera inspection during maintenance shows whether roots are sneaking in or grease is coating the pipe, and clearing it early avoids the midnight emergency call.
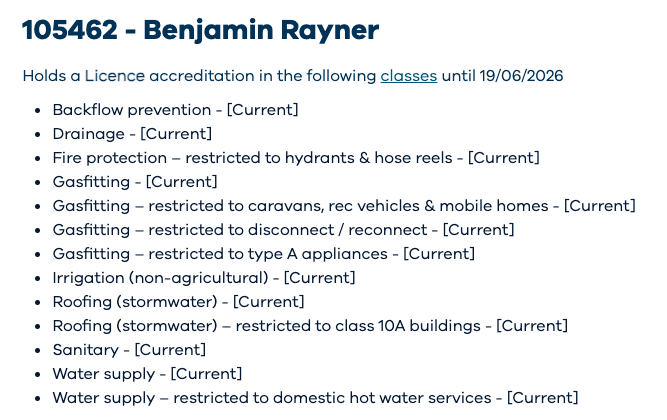
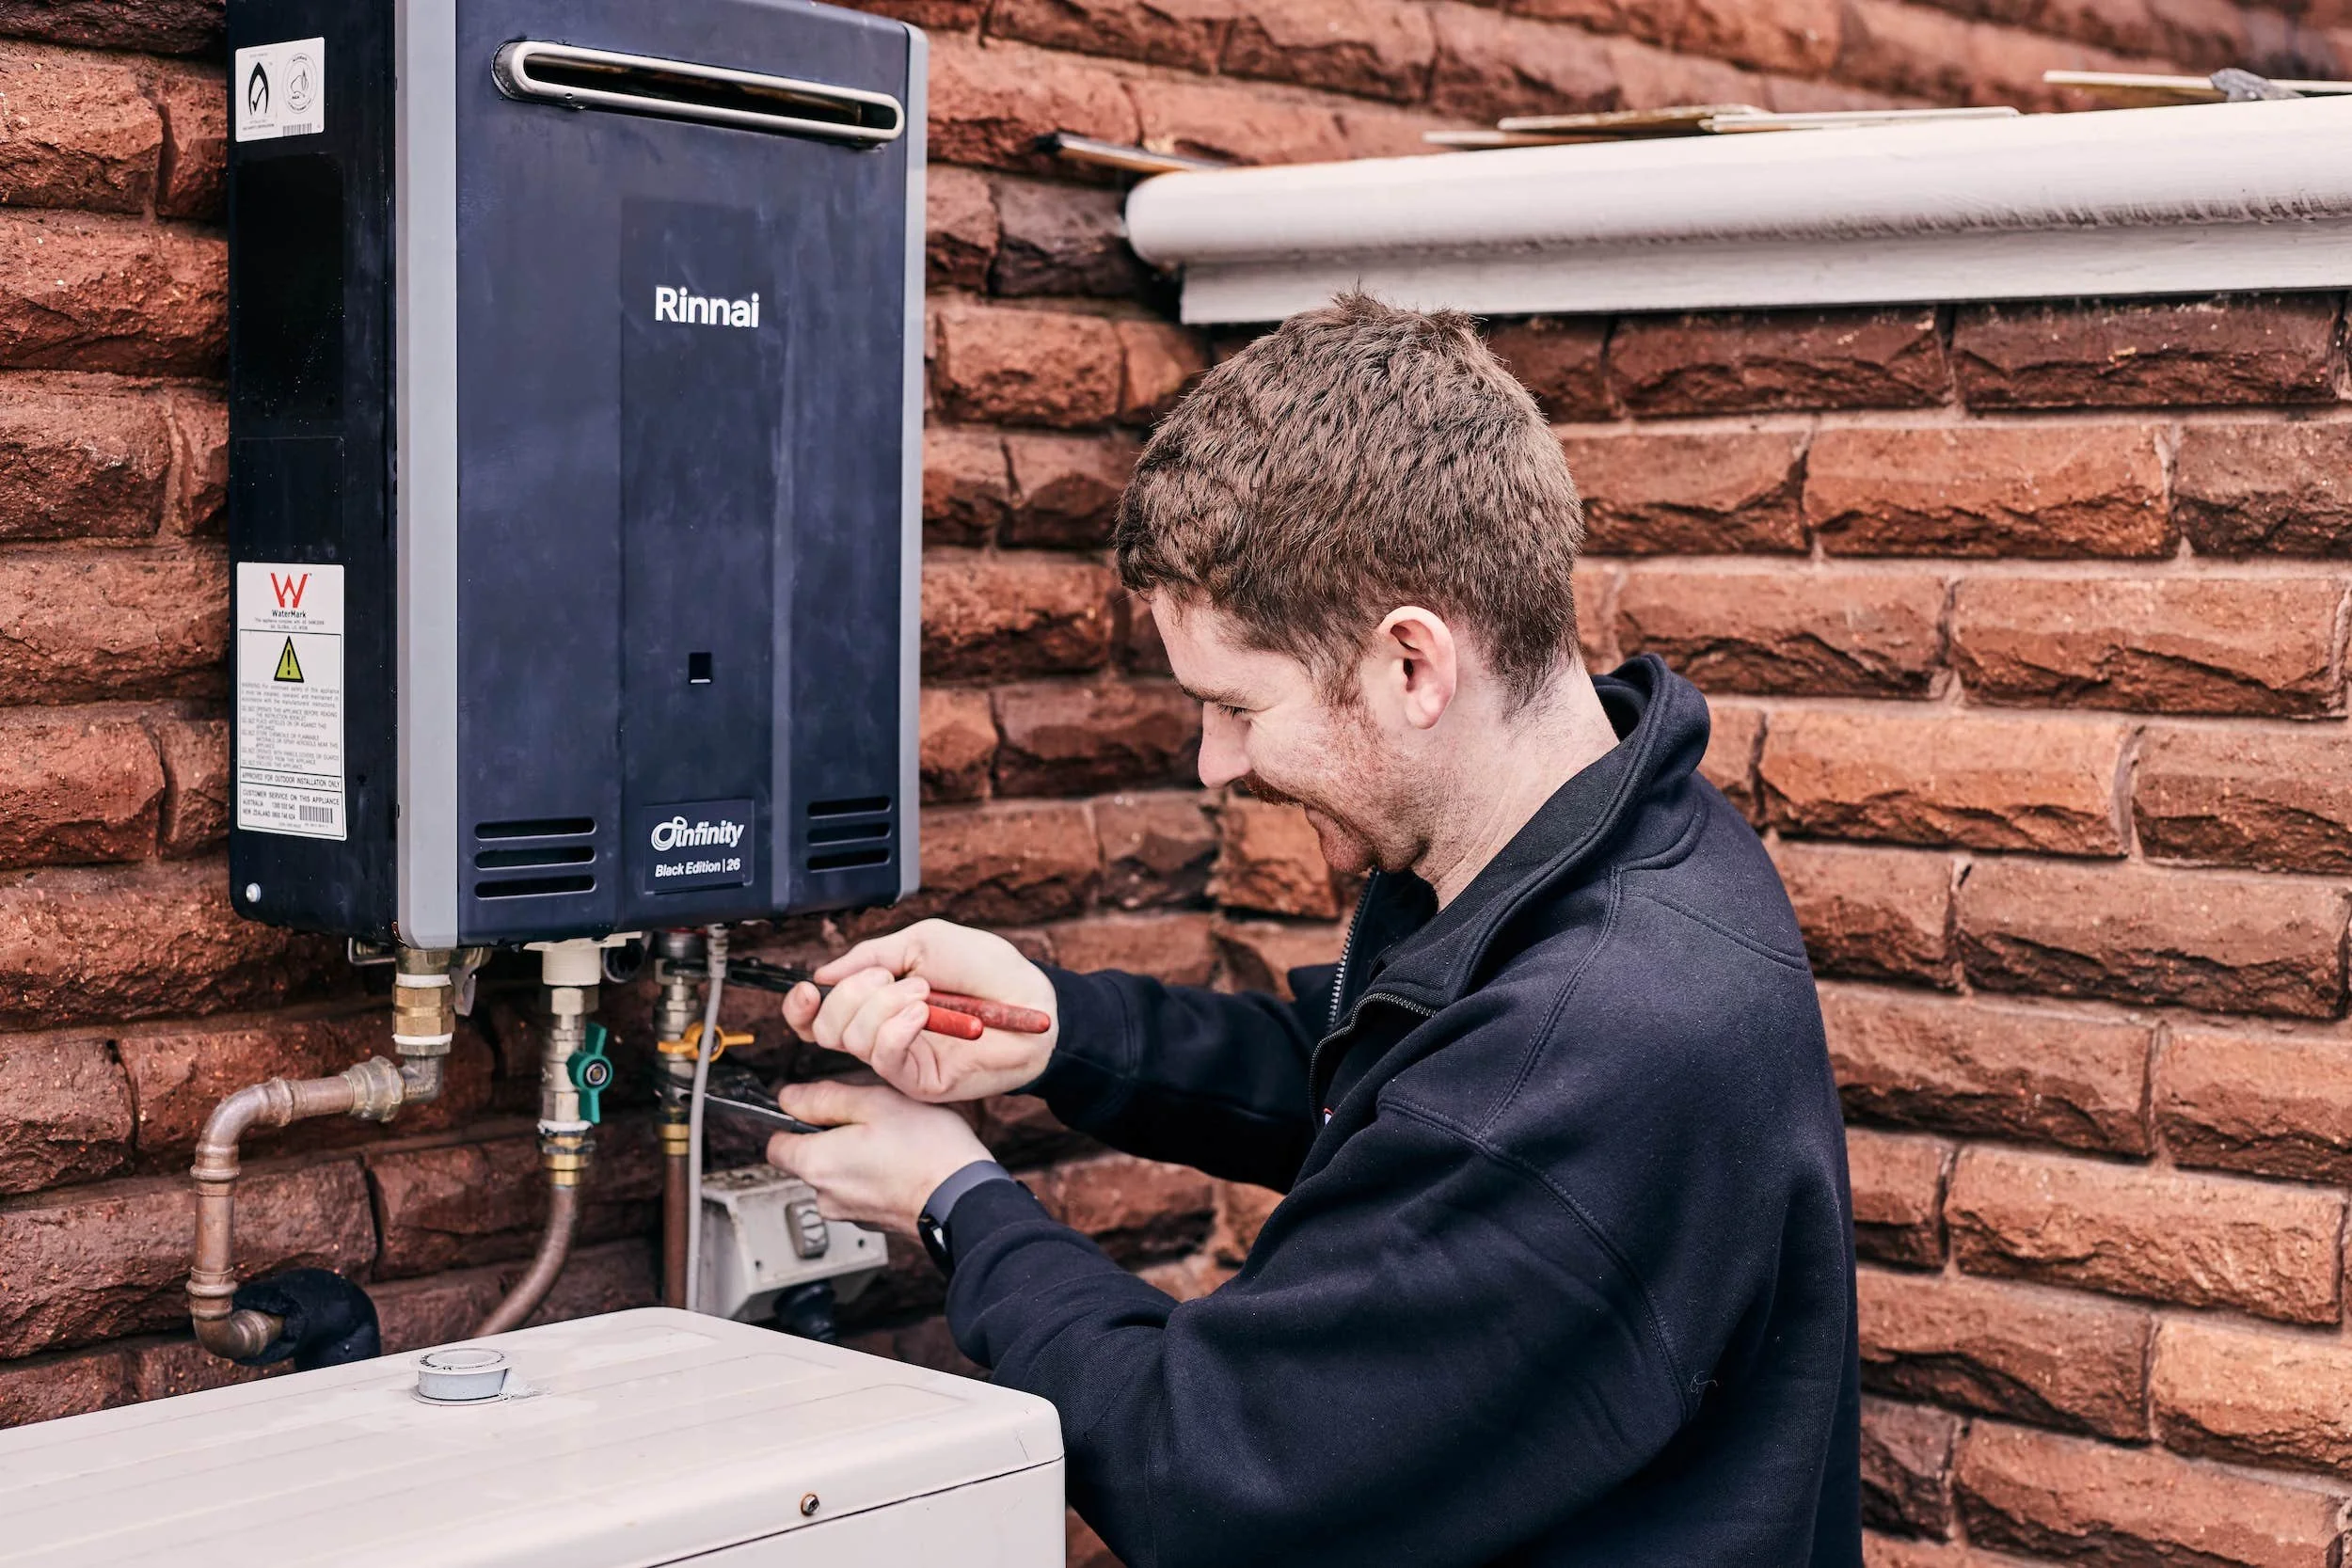
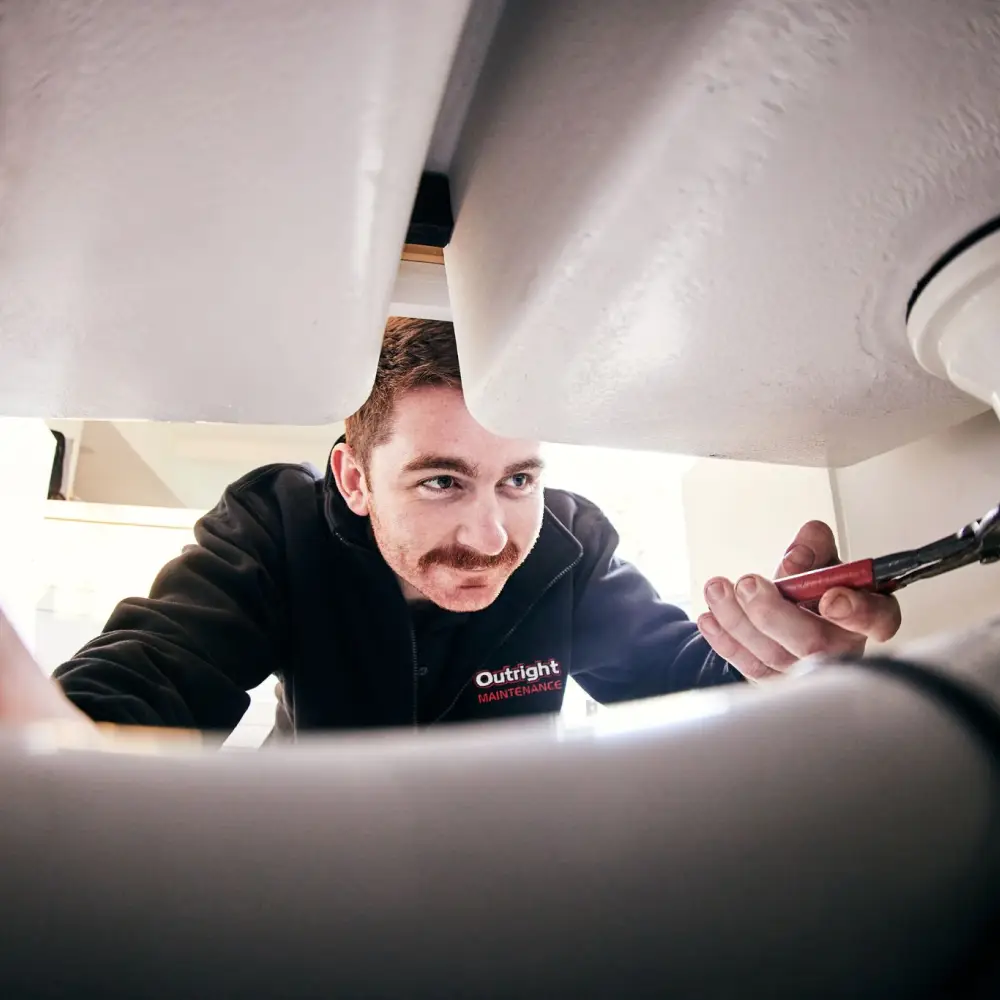
Fully licensed and insured for every job we do


What’s included in our plumbing maintenance services
A maintenance visit isn’t just a quick look around. We go through the important checks, do the small fixes, and make sure your plumbing’s ready for whatever your home or business throws at it.
.svg)
Plumbing system health check
We test water pressure, look for signs of leaking pipes, and inspect your drains for blockages starting to form. It’s about catching the little problems before they snowball into major repairs.

Comprehensive cleaning and basic adjustments
If we spot a dripping tap or some gunk slowing your sink or shower, we’ll sort it out straight away. These small jobs stop wear and tear from turning into bigger headaches.

Preventive maintenance for your type of property
Every property has its quirks. Heritage homes might have old pipes, while commercial kitchens deal with grease and high water use. We tailor our maintenance so it suits your place and prevents repeat issues.
Book Outright Plumbing’s maintenance specialists today
Don’t wait for a leak or blockage to turn into an expensive disaster. Call Outright Plumbing for same-day plumbing maintenance across Melbourne’s southern suburbs.
Real results from our plumbing work
We’ve helped thousands of locals with every kind of plumbing job, from small fixes through to major repairs. It’s that hands-on experience that makes Outright Plumbing’s experts so confident in spotting problems early and keeping plumbing systems running at their best.

Why commercial plumbing maintenance pays for itself
In homes, a leaking tap is annoying. In a school, restaurant, or apartment complex, it’s a flood of complaints, higher bills, and unexpected repair costs. With detailed reports and clear recommendations, Outright Plumbing helps managers budget accurately, reduce tenant complaints, and stay ahead of the failures that cost the most. That’s why smart managers schedule maintenance that keeps everything running and predictable.
- Apartment blocks and body corporates: Shared risers and main sewer lines can turn a small leak into a building-wide headache. Regular inspections prevent expensive water damage claims and keep owners’ corporations out of disputes.
- Hospitality venues: Grease, heavy water use, and high turnover in bathrooms wear systems out quickly. Preventative checks on grease traps, hot water banks, and bathroom fittings keep you compliant and avoid the cost of closing mid-service.
- Schools and childcare centres: Dozens of toilets, basins, and drinking stations see daily use. Maintenance avoids sudden outages, keeps hygiene standards up, and means you’re not scrambling for emergency repairs during term.
- Warehouses and factories: High-pressure lines, safety showers, and large stormwater drains all need routine checks. When they fail, operations stop. Scheduled testing and servicing keep downtime and insurance claims off your desk.
A closer look at our plumbing work
Browse our gallery to see the range of plumbing jobs we’ve completed for homes and businesses right across Melbourne.

Why choose us for plumbing maintenance
Plumbing maintenance only works if it’s done by people who know what to look for. With decades of experience across Melbourne’s south, we know the warning signs, the shortcuts that don’t work, and how to keep every kind of property running smoothly.
Local knowledge that saves time and stress
Being based in Bayside means Outright Plumbing know the southern suburbs, the council rules, and even the quirks of seaside homes. That local experience helps us get maintenance done faster and with less fuss.
A quality guarantee on every job
If something we maintain doesn’t hold up, Outright Plumbing will come back and fix it free of charge. It’s our way of making sure you can always trust the work we do.
Straightforward advice you can rely on
We’ll tell you what needs doing and what doesn’t. No upsells, no padding the job. Our hundreds of 5-star reviews show we’re honest and upfront with every client.
Outright Club benefits for plumbing maintenance
Members get perks like discounts, priority bookings, and faster callouts. It’s a smart option for business owners, property managers, or anyone who wants plumbing maintenance taken care of year-round
Plumbing maintenance services in Melbourne
Based in Bayside, we cover the southern suburbs every day. From heritage houses to modern apartments and commercial sites, we’re close by and ready to get there fast.
Suburbs we service
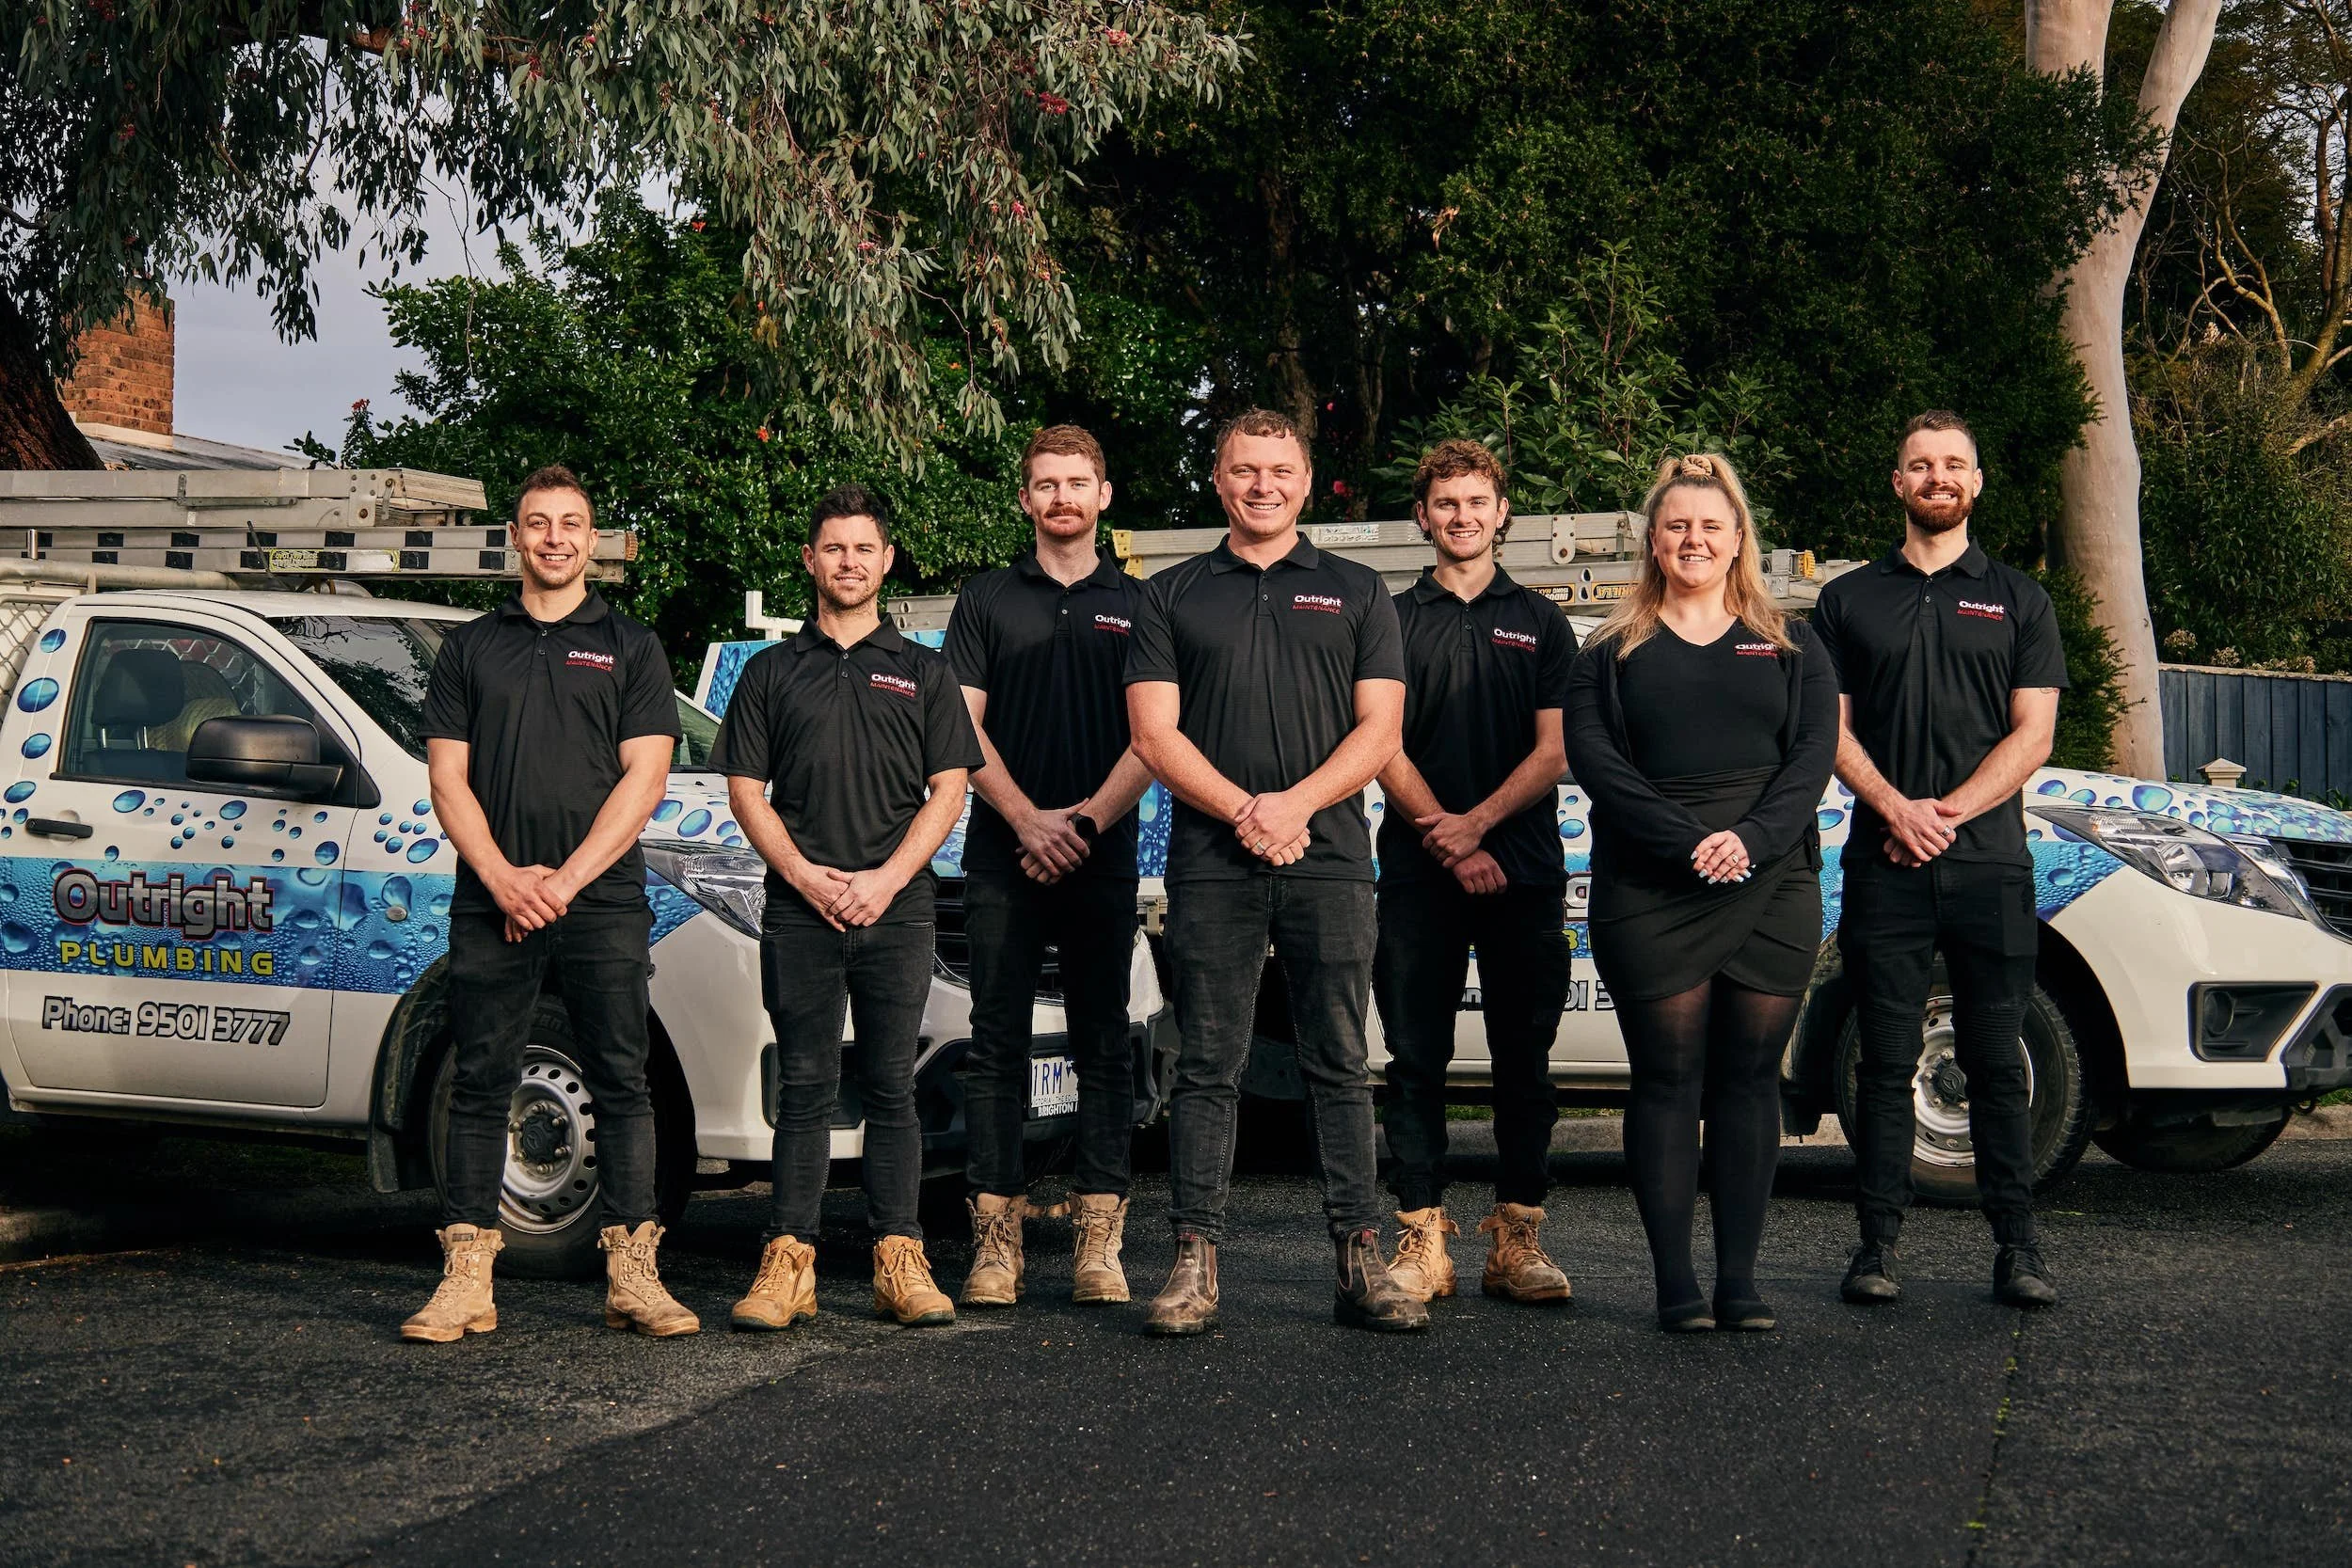
Our team is the real deal
These are the handsome mugs you’ll see turning up at your door, toolboxes in hand.

Ben
Ben started plumbing at just 16 and founded Outright Plumbing at 22, building it into a trusted name in Melbourne’s Bayside. He leads with hands-on experience, high standards, and a genuine focus on long-term client relationships.

Danielle
Danielle co-founded Outright Plumbing from her parents’ garage and now manages the company’s financial heartbeat. Her background in construction and detail-driven approach keeps the business growing strong.

Ben
Ben brings years of hands-on experience and precision to every project he estimates. As Senior Estimator, his deep understanding of plumbing systems and commitment to accuracy ensure each job starts with clarity, confidence, and value.

Courtney
Courtney is the friendly voice on the phone and the organiser behind every maintenance booking. She makes sure plumbers arrive on time, customers are kept in the loop, and everything runs without a hitch.

Josh
Josh leads on-site operations with a steady hand and a sharp eye for quality. As Supervisor, he ensures every plumbing project runs smoothly, safely, and to the highest standard — keeping teams coordinated and clients confident.

Kai
Kai brings a can-do attitude and a knack for solving tricky plumbing problems. He’s all about getting it right the first time, with a smile to match.

Tom
Tom prides himself on work that not only meets but exceeds expectations. He makes sure every customer feels valued and looked after from start to finish.

Alex
Alex is friendly, thorough, and focused on finding the best fix for each customer’s needs. He never leaves a job without making sure it’s up to his high standards.

Callum
Callum’s attention to detail shows in every tap, pipe, and fitting he installs. He takes pride in both the function and the finish of his work.

Aron
Aron oversees day-to-day site operations with a focus on efficiency and craftsmanship. As Supervisor, he brings practical experience and clear communication to every project, ensuring work is completed safely, on time, and to exceptional standards.

Hayley
Hayley keeps projects moving with precision and care. As Project Coordinator, she bridges the gap between office and site, ensuring schedules, communication, and documentation all flow seamlessly from start to finish.
Questions from you, answers from our plumbers
Got questions about plumbing maintenance? Our plumbers share practical advice so you know what’s worth worrying about and what’s not.
What does plumbing maintenance actually include?
Plumbing maintenance is all about stopping small problems from turning into big ones. When we’re on site, here’s the kind of work we cover:
- We check for cracks or damage in your pipes and can step in quickly with burst water pipe repairs before they cause water damage.
- If we find slow drains or sewage smells, we use our blocked sewer drain service to clear the line and keep things flowing.
- Stormwater is a common culprit, so we make sure downpipes and pits are clear. If not, our blocked stormwater drain service sorts it fast.
- Toilets get a good check too. If there’s an issue we can handle everything from toilet unblocking to cistern fixes on the spot.
- For hidden problems, we bring in CCTV drain camera inspections to see exactly what’s going on underground.
- Safety is a big part of maintenance. That is why we include gas leak detection when needed to keep your property secure.
- We also keep an eye on your hot water. Our hot water system maintenance service makes sure you have reliable hot water ready to go.
- Roofs are not forgotten either. Our roof plumbing service checks for leaks that can cause damage inside your home or business.
And because not every problem waits politely, we are on call with emergency plumbing services if something urgent comes up during a visit.
How often should I book plumbing maintenance for my property?
For most homes in Melbourne, a yearly plumbing maintenance visit is usually enough. That gives us a chance to catch leaks, test water pressure, and clear drains before anything turns into a bigger issue. If your place is older, or you’ve had plumbing issues before, every six months is often a safer bet.
Commercial properties often need more frequent checks. Restaurants, cafés, and businesses with heavy water use put more strain on their plumbing, so quarterly visits can save you from costly downtime. Our local plumbers can help you set up a plan that suits your property and keeps everything running smoothly.
What does plumbing maintenance cost in Melbourne?
Plumbing maintenance is usually far cheaper than waiting for something to fail. We’ll always give you a clear quote before we start, so you know the price up front. The final cost depends on the size of your property, the number of fixtures, and how much work is needed on the day.
It’s worth remembering that routine checks help you avoid bigger expenses. Fixing a dripping tap or catching a broken pipe early is much more affordable than an emergency call-out. With Outright Plumbing, you get a fair price, a punctual team, and work done efficiently by plumbers who know their trade.
How do you spot a dodgy plumber?
Unfortunately, not every tradie out there plays by the rules. A few red flags are easy to spot:
- They can’t provide a licence or refuse to give it.
- Quotes are vague or constantly changing.
- They arrive late, rush the job, or leave a mess behind.
- They can’t explain what they’re doing in plain language.
In Victoria, all licensed plumbers are registered with the Victorian plumbing industry. Always ask to see their details. Choosing a licensed and insured plumber protects you from shoddy work and makes sure the job meets Australian standards.
Does Outright Plumbing offer plumbing maintenance for landlords and renters?
Yes, we work with landlords, tenants, and property managers across Melbourne. For landlords and real estate agents, regular plumbing maintenance means fewer emergency calls and happier tenants. We can provide detailed reports, handle communication directly with renters, and keep properties in good shape.
For renters, we can quickly address problems like leaking taps, blocked toilets, or low water pressure. If you are renting and notice something that needs attention, we’ll coordinate with your landlord to resolve it promptly and professionally. It’s all about keeping things running without stress for either side.
What’s included in a plumbing maintenance report?
After every visit, we provide a clear report so you know exactly what we found and what needs attention. This isn’t just a checklist — it’s a useful record you can refer back to and share with landlords, property managers, or insurers if needed.
A typical report will cover:
- A summary of the fixtures and systems inspected.
- Any problems spotted, from leaks to drainage issues.
- Recommended solutions and a suggested timeframe for fixing them.
- Photos of hidden areas needed inspection.
It’s a simple way to show what was done and what comes next.
Is plumbing maintenance covered by insurance or warranties?
In most cases, insurance doesn’t cover routine maintenance. Policies usually cover sudden events, like a broken pipe or major water damage, but not preventative work. Warranties on appliances, such as hot water units, sometimes require proof of regular servicing to stay valid.
If you’re not sure, check your policy details or speak with your insurer. Our reports give you written proof of maintenance, which often helps smooth the process if you need to make a claim down the track. A quick bit of preventative care now can save you a big headache later.
Do you offer ongoing maintenance plans or one-off visits only?
We do both. Many homeowners call us for one-off maintenance when something feels off, like lower water pressure or strange drain smells. That quick visit is often enough to solve the problem.
For businesses and property managers, we also set up ongoing maintenance plans. These are scheduled visits tailored to your property, so you know your plumbing is being looked after regularly without you needing to think about it. Whether you need us once a year or once a quarter, our team of plumbers can keep everything running smoothly.
More from the Outright Plumbing blog
Want to learn more about keeping your plumbing in good shape? Here are a few quick reads from our blog:
.webp)
Our Insta’s dripping with content
Follow us for a mix of plumbing fixes, strange things we’ve found in drains, and the occasional bad joke from the team.
Schedule regular plumbing maintenance with Outright Plumbing
Regular maintenance stops the little problems from turning into big ones. Fill out the form, and our team will be in touch quickly to lock in a same-day visit.